Thursday, March 22

Bowling Party - Party Table

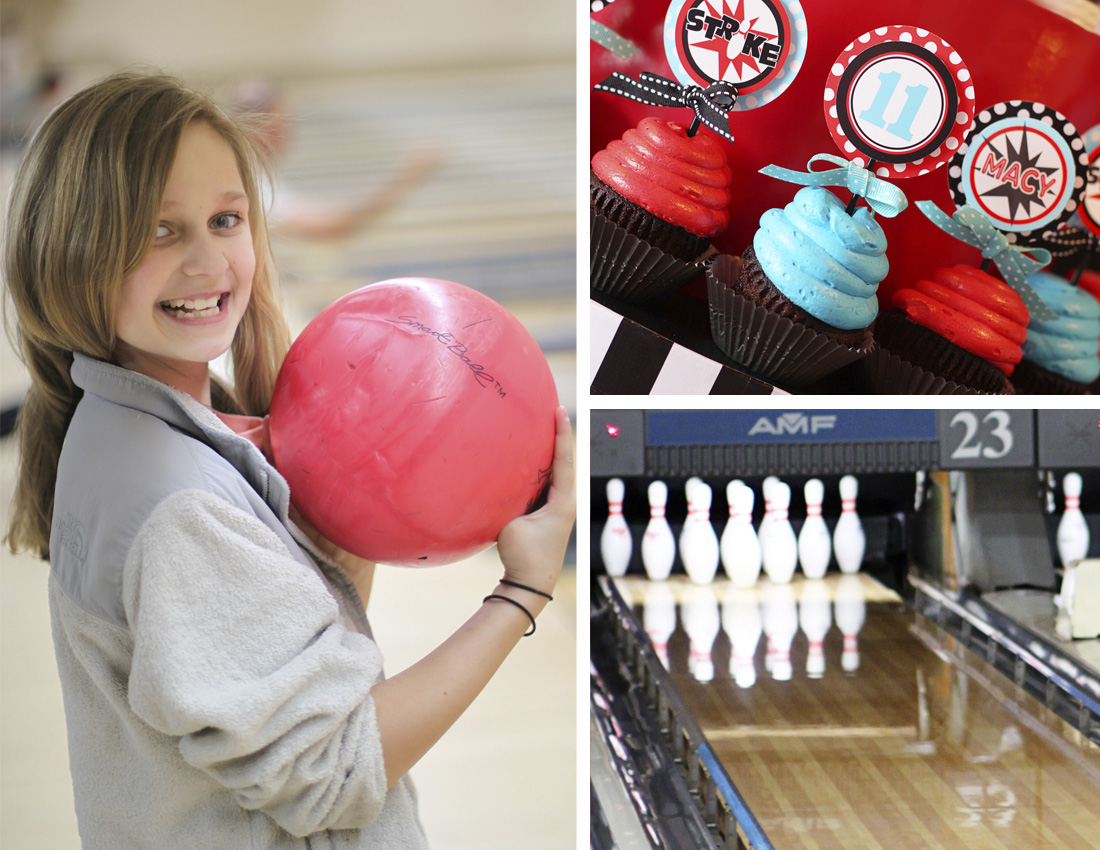
Yesterday I shared the DESSERT TABLE photos and how-tos from my daughter's recent bowling party. And today I'm sharing a little more including some photos from the party table and of the kids having a great time celebrating.

This party was pulled together in just a few days and I hope that it goes to show all moms out there that no matter how late we are in planning a birthday party, it's do-able. Printables make it so easy to pull a party together and starting with a printable set gives good direction for any party. Once you know the colors, a quick trip to Party City, the grocery store and a craft store and you can be on your way to a fabulous little celebration. 


  • Using chip board letters from Hobby Lobby covered in glittery scrapbook paper was a great way to make the birthday girl feel special. I tied some pieces of tulle to some ribbon, glued the letters of her name on and tied the ribbon around the chair Macy would be sitting in.


  • The table settings were pulled together quickly with paper plates from Party City, cups from the Dollar Tree and fun little trophies for each guest (Party City). The cups were adorned with some ribbon and a bowling logo from the BOWLING PRINTABLES SET.
  • Utensils were wrapped in a black napkin and I used a bowling ball cut out from the printables set to add a fun extra. Punching a hole in each side of the bowling ball and stringing ribbon attaches it around the napkin.


  • Small pennants from the printables set were used as name cards for each guest. Pixie sticks and a small round ball of chocolate resembling a bowling ball was placed inside each trophy
  • Each place setting used a piece of 12"x12" scrapbook paper as a placemat
  • A table runner was made by using a strip of black and white dot wrapping paper
  • Centerpieces were made from bowling themed cut outs from the BOWLING PRINTABLES SET
  • Hershey's Kisses and miniature candy bars wrapped in bowling stickers from the printables set added a sweet little extra to the table for the kids

  • The kids loved getting awards for the bowling abilities. I made each of the ribbons quickly the night before the party using scrapbook paper and the award circles from the printables collection. Here is a tutorial that might help if you'd like to make your own.
  • A "Guess How Many?" game was set out for the kids to guess how many gumballs were in the container. The winner got to take home the gumballs which the kids LOVED.


  • Favors were made for each guest using turquoise baskets from the Dollar Tree with water bottles wrapped in bowling printable wraps, some pixie sticks, a sucker, some chocolate candies and a treat bag of black gumballs with a printable tag that said "Thanks, I had a ball!"
  • Each favor basket was embellished with three colors of tulle, red, black and turquoise and tied with red/white bakers twine and a bowling pin cut out from the printables set.


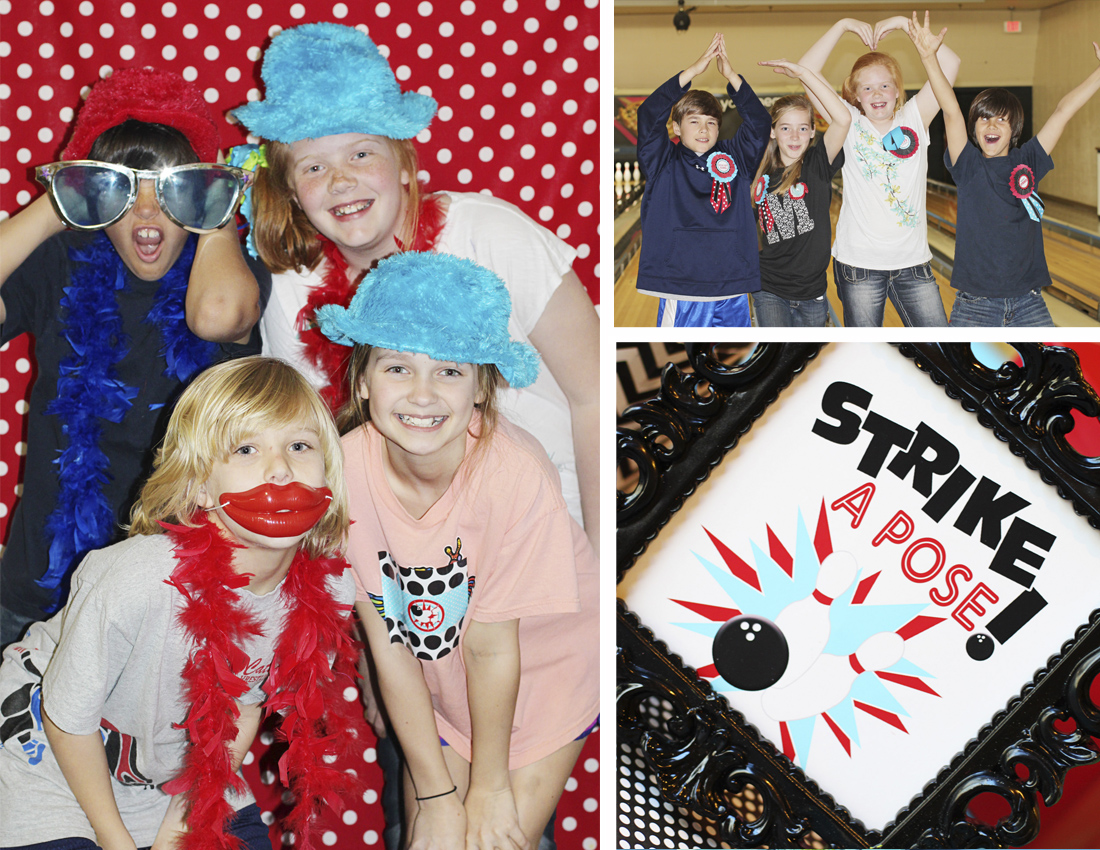
  • A photo booth for the kids was set up by placing a couple of yards of red and white dot fabric on the wall and giving them some fun props to be a little crazy with. A frame and some Dollar Tree supplies like furry hats, boas and these great big lips kept everyone laughing and having a good time.


It was a blast for the kids, and now with so many photos we'll have lots of great memories from the day. 

VENDORS:
Party Styling and Photography (Amanda's Parties To Go)
Party Printables (Amanda's Parties To Go Etsy)
Fondant Toppers (Edible Details)
Red/white snack cups (Pick Your Plum)
Striped straws (Shop Sweet LuLu)
Adhesive paper for water bottle, candy wraps and Hershey's Kisses (Online Labels)
Ribbons, hat boxes, numbers & letters (Hobby Lobby)
Red backdrop paper/box covering (Walmart)
Cupcakes (Publix)
Gumballs, paper plates, tablecloth (Party City)
Turquoise favor baskets, glass vases (Dollar Tree)

Tuesday, March 20

Bowling Party - Dessert Table

I'm so excited to share the photos from my daughter's bowling party a few weekends ago.

Sometimes being the owner of a party business means your own children’s birthdays can sneak up on you. And this year, a week before my middle child’s birthday we realized we had no plans — Oh no!

We decided a last minute bowling party was the way to go. Acting quickly to pull it all together involved an almost all-nighter of designing a set of bowling party printables and luckily, we sent out invitations the very next day.


DESSERT TABLE DETAILS:
  • The centerpiece was created from paper mache boxes covered in paper patterns to coordinate with the BOWLING PARTY COLLECTION. The base in bold black and white stripes was a fun find from Hobby Lobby. The red center box was covered in red wrapping paper from Walmart and the top box was covered in the printable black chevron paper from the printables collection.
  • The “11” on the top was created from wood numbers covered in turquoise glitter cardstock.
  • On either side of the centerpiece, tiered boxes held a fun bowling topper created from the printable bowling pins from the collection and a styrofoam ball covered in decoupaged black napkins to resemble a bowling ball.
  • A simple backdrop made from a 4’x4’ piece of ¼” plywood covered in alternating pieces of black and white 12”x12” scrapbook paper was a striking complement to the rest of the dessert table decor.
  • Another fun element of the table included plates of store-bought chocolate covered doughnuts placed on DIY cake stands made from thrift store candle holders and lazy susan tops. I love these cake stands and use them all the time for different parties. I can glue on different ribbons and trims and completely change the look from party to party.
  • To save time, the cupcakes and cookies were store-bought and embellished with printable cupcake toppers and gorgeous fondant toppers from the talented Brittany of Edible Details.
  • Since I was in a time-crunch the marshmallow pops were the only food I made myself. In only about an hour, I covered the tops of over-sized marshmallows with turquoise and red chocolate candy melts sprinkled in colored sugars. A fun little “bowling ball” made from a chocolate candy melt with three white dots topped off the treats. Placing the marshmallow pops in Dollar Tree glass vases covered in a red/white dot printable paper made a simple display. Surrounding them with cups of gumballs added a touch of color and another sweet kid favorite.
  • Other items on the dessert table included candy bars wrapped in the party printable design and Dollar Tree favor boxes covered in a printable black and white stripe paper to hold popcorn for the guests. A printable bowling ball design was added to the front of each snack box to tie in the theme.

Stay tuned for tomorrow's post on the place settings and table centerpieces as well as a fun idea for a STRIKING Photo Booth! Yes, I've even got more photos! 

VENDORS:
Party Styling and Photography (Amanda's Parties To Go)
Party Printables (Amanda's Parties To Go Etsy)
Fondant Toppers (Edible Details)
Red/white snack cups (Pick Your Plum)
Striped straws (Shop Sweet LuLu)
Adhesive paper for water bottle, candy wraps & Hershey's Kisses (Online Labels)
Ribbons, hat boxes, numbers & letters (Hobby Lobby)
Red backdrop paper/box covering (Walmart)
Cupcakes (Publix)
Gumballs, paper plates, tablecloth (Party City)
Turquoise favor baskets, glass vases (Dollar Tree)


______________________________________________________________________


Monday, March 19

FREE Easter Printables Set for Operation Shower

Photobucket
Today I have EXCITING NEWS! I've decided to post another FREEBIE for Easter!

And this one is a
FULL SET OF EASTER PRINTABLES!

Perfect for Easter brunches, Easter Egg Hunt Parties and family & church get togethers. It's packed full of files and includes some adorable polka dot bunny cut outs as well as some sweet cross cut outs, a banner, cupcake toppers and more.

All I ask is that you visit my NEW FACEBOOK Fan Page and Click LIKE below:


 I created this set last year to raise donations for a very worthy cause, Operation Shower. What's Operations Shower, you say? Operation Shower honors military families by providing joyful baby showers for expecting military wives.

Through your donations, Operation Shower is able to host amazing baby showers for expectant military families, deliver high-quality products for the showers and create a shared, memorable experience for those families who do so much for us.


I hope that once you download the FREE EASTER PRINTABLES, you'll be sure to...  

1. Check out Operation Shower’s website to find ways to donate or volunteer.


3. Facebook/Tweet/Blog about this FREE EASTER DOWNLOAD to help spread the word Operation Shower.

4. Donate to Operation Shower here.


There are lots of really cute printables for Easter fun and could
also make sweet favor tags for friends and Sunday school teachers!

Thanks everyone for supporting our military families!

Sunday, March 18

Tutorial for Easter Basket Favors

Have you got Easter on your mind yet? It's just around the corner and we'll all need some creative ideas for fun Easter favors and treats.

Today I thought I'd share a simple little tutorial of Easter basket favors made from the cupcake wraps and party flags from the EASTER PRINTABLES COLLECTION. How much fun are these! And so simple to make, too. If you don't want to buy the Easter collection, you can always make your own using scrapbook paper or cardstock and the cupcake wrap template HERE.
Here's what you'll need:

- Mini Robin's Eggs (Whoppers brand malted eggs)
- Green Easter grass
- Paper Nut/candy cups (find on cake decorating aisle of craft stores)
- Printable cupcake wraps and straw flags (or some scrapbook paper of your choice)
- Hot glue and gun
- Scissors
- Scotch tape
- Easter suckers (mine are from the Dollar Tree - $1.00/6pieces)
- Piece of green florist foam or styrofoam


Photobucket
Step 1: Print and cut your cupcake wraps and toothpick flags out.


Photobucket
Step 2: Assemble cupcake wrap by wrapping around nut cup and securing with tape.

Photobucket
Step 3: Now take your straw flag piece and hot glue one edge inside the cupcake wrap.... then glue down the other side to create a basket.

Photobucket
Step 4: Cut small pieces of green florist foam or styrofoam into squares and hot glue to the bottom of your paper nut cup.

Photobucket


Photobucket
Step 5: Stick Easter egg sucker into your florist foam and add a few robin's egg to weigh down the cup so it won't tip over.


Photobucket
Step 6: Add Easter grass and robin's eggs.

Photobucket
Step 7: Dab a small bit of hot glue to the back of your sucker where it meets the handle of your basket and adhere the sucker to the handle. This way the sucker will stay in place.

You're done -- that's all. EASY! If you'd like, at this point, you could wrap each basket in some cellophane and tie it up with a sweet ribbon and favor tag to give to classmates, teachers or Sunday School classes.

I hope you enjoy this simple little Easter project. 
______________________________________________